If you’ve ever picked up an EU standard plug pin (you know, the ones with the two round brass pins that slot into every wall socket across Europe, right?), you might’ve wondered why some manufacturers go the extra mile with quality checks for these tiny metal bits. As someone who’s actually been part of making and supplying these pins for years—rather than just writing about them on a screen—I can tell you this: insulation resistance isn’t just a random test. It’s the difference between a plug that works reliably for 10 years and one that could cause a loose connection, overheating, or even a safety hazard. Eu Standard Plug Pin

First, let’s clear up what insulation resistance even means, for anyone who’s not a certified electrician but still cares about their DIY projects or just how these plugs work. Insulation is the stuff that keeps electricity from jumping where it shouldn’t, right? Wait, no—wait, when we talk about a plug pin itself, we’re not talking about the plastic insulation on the cord or the plug body. We’re talking about the resistance between the metal pin (which is the conductor carrying electricity) and any other part that shouldn’t be conducting—like the outer metal shell of the plug, or adjacent pins, or even the air around it. The number we’re after here is how much that resists a tiny electric current, and for EU plug pins, there’s a standard we all stick to that makes this test non-negotiable.
A lot of new suppliers try to skip this test to save time or money, and we’ve seen what happens. Cheap pins that fail insulation resistance checks end up in faulty plugs that get returned, or worse, end up in consumer homes. That’s why we built our testing process right into our production line, not as an afterthought. Today, I’m gonna walk you through exactly how we do it—so if you’re a buyer, a DIYer working on a custom plug, or another supplier curious about the real process (no fancy jargon, promise), you’ll know what to look for.
First, let’s get the basic rules straight: EU standard plug pins follow EN 50075, right? That’s the European norm for domestic plugs. The EN 50075 standard says the insulation resistance between the live pin, neutral pin, and the earth pin (wait, hold on—wait, two-pin EU plugs don’t have an earth pin, but three-pin do, right? We make both) should be at least 5 MΩ (that’s megaohms, for anyone who doesn’t deal with resistor numbers daily). Yeah, that’s the minimum. But we test for way higher, because if we sell a pin that’s just hitting 5 MΩ, it might be on the edge of failing under real use—like when it’s cold, or damp, or gets a little scuffed during shipping.
Now, what tools do you actually need for this test? You can’t grab a regular multimeter here—those are for low-resistance stuff. You need an insulation resistance tester, sometimes called a “megohmmeter” or just a “megger” (that’s the common nickname everyone uses, even us old-timers). The megger we use for plug pins is a portable one that outputs 500 V DC (direct current)—that’s the exact voltage specified for testing small electrical components like this. If you use too low a voltage, you won’t get an accurate reading; too high, and you might damage the pin’s plating or any tiny gaps that should stay insulating.
Wait, hold on, important note: never test a plug pin that’s already attached to a plug body, right? Or wait—actually, sometimes we test bare pins first, then test assembled plugs, but let’s do bare pins first because that’s the critical part. Let’s say you have a raw, unplated brass pin (wait no, most EU plug pins are brass plated with nickel or tin for corrosion resistance) sitting in front of you. How do you set up the test?
First, prep the pin and the tester. Make sure the pin is clean—no oil, no dust, no leftover metal shavings from production. Even a tiny speck of metal debris can mess up the resistance reading, making it look lower than it actually is. We use isopropyl alcohol and a lint-free cloth to wipe every pin down before testing. Then, the megger: set it to 500 V DC, and let it warm up for 30 seconds—cheap or old meggers can give wonky readings if they’re not ready.
Next, the test connections. For a bare two-pin EU plug pin set, you have two round pins, 19 mm long usually, spaced 19 mm apart. We need to test the resistance between Pin 1 and Pin 2 (those are live and neutral, remember), and also each pin to a reference point that mimics the outer shell of the plug (the part that holds the pins, which is insulating plastic in the plug body, but we can use a metal block as a stand-in for testing—just make sure that metal block isn’t touching either pin’s conductor, we insulate the stand with rubber so only the pin is touching the test lead). Wait, right, the standard requires two main tests for plug pins: 1) between adjacent conductors (the two live/neutral pins), and 2) between each conductor and accessible conductive parts of the plug (or in bare pin terms, a simulated outer conductor).
Wait, let’s make that super specific for EU pins, because this is where a lot of people mess up. EU standard pins have a diameter of 4 mm, right? So when we clamp the test leads onto the pins, we use alligator clips with soft rubber tips so we don’t scratch the plating—scratching the plating can lead to corrosion later, which would lower insulation resistance over time. One test lead connects to Pin A (say, live), the other test lead connects to the metal stand (simulating the plug’s outer metal shell, which the standard counts as an accessible part). We press the “test” button on the megger, and wait 10 seconds (important—insulation resistance readings take time to stabilize; if you read it at 2 seconds, it’ll be artificially low). A good pin will give a reading of 100 MΩ or higher—way above the 5 MΩ minimum required by EN 50075. Then we do the same for Pin B (neutral) to the metal stand, and also Pin A to Pin B, to check for leakage between the two main conductors. That’s three readings per pin set, every single one.
Now, if you’re testing assembled plugs (not bare pins), it’s almost the same, but you have to make sure the plug’s plastic body is fully cured—if it’s still soft or has moisture trapped in it, that will skew the reading. We let assembled plugs sit in a humidity-controlled room for 24 hours before testing, because EN 50075 also requires that tests happen under specific humidity (40-60% RH) and temperature (20-25°C) conditions. That’s a detail a lot of small suppliers skip, which is why their test results are inconsistent.
Wait, I should mention common mistakes people make here, because that’s stuff we’ve learned the hard way. First, using a multimeter instead of a megger. Multimeters only output like 1.5 V or 9 V—way too low to push current through the thin insulating gaps around the pin’s plating or any surface contaminants. You’ll get a reading that looks perfect, but it’s actually useless for real use. Second, not waiting the full 10 seconds for the megger reading. The current takes time to flow through the insulation (even good insulation has a tiny amount of “leakage current”), so if you stop too early, you’ll get a lower-than-actual reading, or even a false fail. Third, dirty pins—like I said earlier, a tiny bit of metal dust from machining will connect the two pins, making the insulation resistance read zero, which is a fail. We have a whole team member whose only job is to wipe pins before testing, because we’ve had batches get rejected just because someone skipped that step.
Another thing: what if a pin fails the test? We don’t just toss it—we check why. Sometimes it’s a bad plating job, where there’s a pinhole in the nickel plating that exposes the brass underlayer, making conductivity too high. Sometimes it’s a scratch that went all the way through the plating. Rarely, it’s a manufacturing defect where the pin is slightly misshapen, leading to a gap that’s too small. We track every failed pin’s reason, so we can fix the production line—like if we see 10 failed pins from a single plating batch, we call our plating supplier immediately to get that fixed.
Wait, let’s talk about why this test matters so much for EU plugs specifically. EU plugs are used in millions of homes across 27+ countries, right? EN 50075 is a harmonized standard, so every manufacturer has to follow it to sell plugs in the EU. If a plug’s pins have low insulation resistance, that means there’s a chance electricity could leak out to the plug’s metal body, or to another pin, when the plug is inserted into a socket. That’s a shock hazard, or it could cause a short circuit when you plug in a laptop, a fridge, whatever. As a supplier, we take that seriously—we don’t want our pins to be part of a safety issue, and I know every other reputable EU plug pin supplier feels the same, even if some cut corners.
Now, if you’re someone who needs to source EU standard plug pins, whether you’re a plug manufacturer, a distributor, or even a business that sells replacement plugs, what should you ask your supplier about this test? Don’t just take their word for it—ask: do you test every individual pin (not just random samples) with a 500 V DC megger? What’s your minimum acceptable insulation resistance, above the EN 50075 5 MΩ? Do you test under controlled temperature and humidity conditions? Because if they can’t answer those, their pins might not be up to snuff.
For DIYers who are making their own custom plugs (yes, some people do that for projects—though we always remind people to follow local electrical codes), you can do this test at home if you have a basic megger (they’re not super expensive, you can get a decent one for under $100 online). Just remember: never test a plug that’s connected to power, always wear rubber gloves when testing, and dispose of any pins that fail the test—don’t try to use them, even if you think you can fix them.
Wait, let’s wrap this up, because I know you’re probably here for practical info, not just a lecture. The step-by-step check for EU standard plug pin insulation resistance, simplified, is:
- Grab your 500 V DC megger, let it warm up 30 seconds, set the correct voltage.
- Wipe each pin set with isopropyl alcohol to remove all dirt, oil, or metal shavings.
- Connect one test lead to Pin 1 (live), the other to a simulated conductive part of the plug (a metal block with rubber insulation so only the test lead touches it). Wait 10 seconds, record the reading. It should be 5 MΩ minimum, we recommend 50 MΩ+.
- Repeat Step 3 for Pin 2 (neutral) to the metal block, then for Pin 1 to Pin 2 (checking between the two main conductors).
- If all three readings meet or exceed your required standard, the pin set is good. If not, it’s defective.
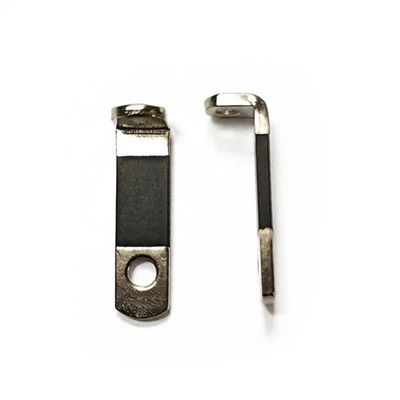
At the end of the day, insulation resistance testing for EU plug pins is all about safety. It’s not a hoops manufacturers make you jump through—It’s how we make sure the products we supply won’t let consumers down. If you’re looking for reliable, tested EU standard plug pins for your business or projects, don’t hesitate to reach out to us to discuss your specific needs, whether that’s custom sizes, bulk orders, or additional quality testing you might require.
Uk Standard Plug Pin References
EN 50075: 2018, “Domestic plug and socket-outlet systems for household and similar purposes — Plugs with attachment plugs of the type C for AC 250 V”
IEC 60512-1:2014, “Connectors for electronic equipment — Tests and measurements — Part 1: General and definitions”
Dongguan Fangrun Metal Products Co., Ltd.
We’re well-known as one of the leading eu standard plug pin manufacturers in China, specialized in providing high quality customized products. Please feel free to buy discount eu standard plug pin made in China here from our factory. For quotation and free sample, contact us now.
Address: New Town Industrial Zone,Xiegang Village,Xie Gang Town,Dongguan City
E-mail: 825556703@qq.com
WebSite: https://www.fangrunpin.com/
